A reliable, step-by-step guide to bring a VirtualBox/VMware .ova into QEMU/KVM, with both GUI and CLI paths—and fixes for the most common pitfalls.Contents
- Prerequisites
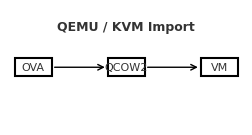
- 1) Extract the OVA
- 2) Convert VMDK → QCOW2
- 3) Create the VM in virt-manager (GUI)
- 4) Alternative:
virt-install(CLI) - 5) Common gotchas & fixes
- Quick troubleshooting checklist
Prerequisites
- QEMU/KVM, libvirt, and virt-manager installed on the host.
- User is allowed to manage libvirt (typically being in the
libvirt/libvirtdandkvmgroups). - Enough disk space to hold the converted image (QCOW2).
1) Extract the OVA
An OVA is a tar archive containing an .ovf (metadata) and one or more .vmdk disks.
mkdir ~/ova-import && cd ~/ova-import
tar -xvf /path/to/your-image.ova
# Expect: appliance.ovf, disk0.vmdk, (maybe disk1.vmdk, .mf), etc.
2) Convert VMDK → QCOW2 (recommended)
QCOW2 supports snapshots and sparse allocation.
# Single-disk OVA
qemu-img convert -p -f vmdk disk0.vmdk -O qcow2 disk0.qcow2

# Inspect the result
qemu-img info disk0.qcow2

# (Optional) Grow before first boot
qemu-img resize disk0.qcow2 +20G
For multi-disk OVAs, convert each .vmdk to its own .qcow2.
3) Create the VM in virt-manager (GUI)
- Open Virtual Machine Manager → Create a new virtual machine.
- Select Import existing disk image.
- Browse to
disk0.qcow2. - Choose the closest Guest OS type (Linux/Windows and version).
- Firmware:
- Try UEFI (OVMF) first if the source VM used UEFI.
- If it fails to boot, recreate the VM using BIOS (SeaBIOS).
- Assign CPU/RAM to taste.
- Tick Customize configuration before install, then:
- Chipset:
q35is a good default; tryi440fxif needed. - Disk bus: start with VirtIO for performance. If the guest can’t boot/find the disk, switch to SATA. (Windows may need VirtIO drivers—see below.)
- NIC model: virtio (or e1000 for maximum compatibility).
- If using SCSI, add a VirtIO SCSI controller and attach the disk to it.
- Chipset:
- Click Begin Installation.
4) Alternative: virt-install (CLI)
virt-install \
 --name my-imported-vm \
 --memory 4096 --vcpus 4 \
 --import \
 --disk path=/path/to/disk0.qcow2,format=qcow2,bus=virtio \
 --os-variant detect=on,require=off \
 --network network=default,model=virtio \
 --graphics spice \
 --boot uefi
5) Common gotchas & fixes
“network ‘default’ is not active”
If the default NAT network isn’t up:
virsh net-start default
virsh net-autostart default
If the network definition is missing, define it, then start and autostart:
# Path may vary by distro
virsh net-define /usr/share/libvirt/networks/default.xml
virsh net-start default
virsh net-autostart default
Black screen / “No bootable device”
- Try switching Firmware (UEFI ↔ BIOS).
- Change Disk bus from VirtIO → SATA to test.
- Verify the disk has a bootloader/ESP. Attach it to a helper VM and inspect with
lsblk/fdisk -l.
Windows guests (imported from OVA)
- If using VirtIO disk/NIC, mount the virtio-win ISO in virt-manager and install drivers (during setup or via Device Manager).
- If you see INACCESSIBLE_BOOT_DEVICE, switch the disk bus to SATA to boot, install VirtIO storage drivers, then switch back to VirtIO.
Linux guests boot but no network
- Predictable interface names may differ. Check
ip ainside the guest and update its network config. - For very old distros, try NIC model e1000.
CPU features / performance quirks
- In VM CPU settings, use Copy host CPU configuration (aka
host-passthrough) for best compatibility.
Multi-disk OVAs
- Convert each VMDK and attach them in the same order as in the OVF (disk0 → vda/sda, disk1 → vdb/sdb, …).
Quick troubleshooting checklist
- Used the right firmware? (Try UEFI first, then BIOS.)
- Tried switching disk bus VirtIO ↔ SATA?
- Does the libvirt
defaultnetwork exist and run? - For Windows: installed VirtIO drivers or temporarily used SATA?
- For Linux: interface name changed? Adjust network config.
- Set CPU mode to host-passthrough?
Tip: Keep the original OVA and the converted QCOW2 until the new VM boots cleanly.
Blogpost created with AI help